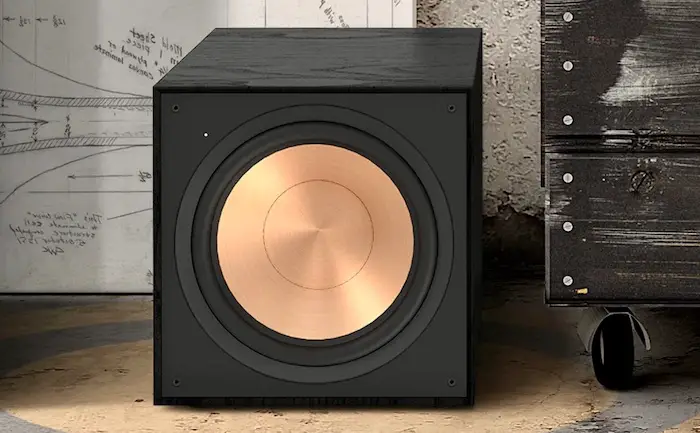
Klipsch is a well-known brand for high-quality audio systems, including subwoofers. However, even the best subwoofers can experience issues and stop working properly.
In this guide, we will explore the potential causes of a Klipsch subwoofer not working and provide steps on how to fix the problem.

Klipsch Subwoofer Not Working: Likely Causes
1. Power Issue
One of the most common reasons for a subwoofer not working is a power issue. This can be caused by a faulty power cord, a tripped circuit breaker, or an issue with the outlet.
2. Audio Input Issue
Another possible cause of a subwoofer not working is an issue with the audio input. This can be caused by a faulty audio cable, a loose connection, or a problem with the audio source.
3. Subwoofer Settings
The subwoofer settings may also be causing the issue. If the subwoofer is not set up correctly, it may not be receiving the proper audio signal.
Subwoofer Hardware: If none of the above causes are the issue, there may be a problem with the hardware of the subwoofer itself. This could be caused by a faulty amplifier or speaker.
How to Fix “Klipsch Subwoofer Not Working” Issues
To fix a Klipsch subwoofer that is not working, you can follow these steps:
1. Check the Power
The first thing you should do when your Klipsch subwoofer is not working is to check the power. This can be caused by a variety of factors, including a faulty power cord, a tripped circuit breaker, or an issue with the outlet.
Checking the power cord and making sure it is securely plugged in to fix this issue. If the cord is damaged or frayed in any way, it may need to be replaced. You can test the cord by plugging it into a different device to see if it works.
The circuit breaker comes next. If the circuit breaker has been tripped, it will need to be reset in order for the subwoofer to function properly. To do this, locate the circuit breaker box and locate the switch for the circuit that powers the subwoofer. Flip the switch to the “off” position and then back to the “on” position.
If the circuit breaker is not the issue, try plugging the subwoofer into a different outlet to see if it works. This will help determine if the issue is with the outlet or the subwoofer itself.
2. Check the Audio Input
If the power issue has been resolved and the subwoofer is still not working, the next step is to check the audio input. This can be caused by a faulty audio cable, a loose connection, or a problem with the audio source.
To fix this issue, start by checking the audio cable and making sure it is securely plugged in. If the cable is damaged or frayed in any way, it may need to be replaced. You can test the cable by using it to connect a different device to the audio source to see if it works.
After that, check the connections at both ends of the cable to ensure they are tight. Loose connections can cause the audio signal to be lost or distorted, which can result in the subwoofer not working properly.
If the audio cable and connections are working properly, consider using a different audio source to see if the subwoofer works. This will help determine if the problem is with the audio source or the subwoofer itself.
3. Check the Subwoofer Settings
The next step is to check the subwoofer settings. The subwoofer may not be set up correctly, which can prevent it from receiving the proper audio signal.
To get the proper settings, refer to the user manual for proper setup instructions. Make sure the subwoofer is set to the correct input and that the volume is not too low. If the subwoofer is connected to a home theater system or other audio systems, check the settings on those devices as well to ensure they are correctly configured.
4. Check the Subwoofer Hardware
If none of the above causes are the issue, there may be a problem with the hardware of the subwoofer itself. This could be caused by a faulty amplifier or speaker.
To fix this issue, refer to the user manual for troubleshooting steps. This may include resetting the subwoofer or checking for any visible damage to the amplifier or speaker. If the issue cannot be resolved, it may be necessary to bring the subwoofer to a professional for repair.
How to Reset the Klipsch Subwoofer
There are a few different ways to reset a Klipsch subwoofer, depending on the model and your specific needs. Here are a few options:
Reset the subwoofer to factory default settings
- Unplug the subwoofer from the power outlet.
- Press and hold the reset button (usually located on the back of the subwoofer).
- While holding the reset button, plug the subwoofer back into the power outlet.
- Continue holding the reset button for 5-10 seconds, until the LED indicator light flashes.
- Release the reset button. The subwoofer is now reset to its factory default settings.
Reset the subwoofer’s Bluetooth connection
- Turn off the subwoofer.
- Press and hold the Bluetooth button (usually located on the back of the subwoofer).
- While holding the Bluetooth button, turn the subwoofer back on.
- Continue holding the Bluetooth button for 5-10 seconds, until the LED indicator light starts flashing rapidly.
- Release the Bluetooth button. The subwoofer is now reset and ready to pair with a new Bluetooth device.
Reset the subwoofer’s audio settings
- Turn off the subwoofer.
- Press and hold the volume down button (usually located on the back of the subwoofer).
- While holding the volume down button, turn the subwoofer back on.
- Continue holding the volume down button until the LED indicator light starts flashing rapidly.
- Release the volume down button. The subwoofer is now reset to its default audio settings.
Note: If you’re unable to reset your Klipsch subwoofer using these methods, or if you have any other issues with your subwoofer, you may need to contact Klipsch customer support for further assistance.


![Samsung Subwoofer Won’t Connect to Soundbar [FIXED] Samsung Subwoofer Won’t Connect to Soundbar [FIXED]](https://audiojust.com/wp-content/uploads/2023/05/samsung-subwoofer-wont-connect-to-soundbar-211x150.jpg)
![Samsung Subwoofer’s Blue Light On But No Sound [FIXED] Samsung Subwoofer’s Blue Light On But No Sound [FIXED]](https://audiojust.com/wp-content/uploads/2022/12/samsung-subwoofer-blue-light-on-but-no-sound-211x150.jpg)


![LG Subwoofer Not Connecting to Soundbar [Solved] LG Subwoofer Not Connecting to Soundbar [Solved]](https://audiojust.com/wp-content/uploads/2022/12/lg-subwoofer-not-connecting-to-soundbar-211x150.jpg)

