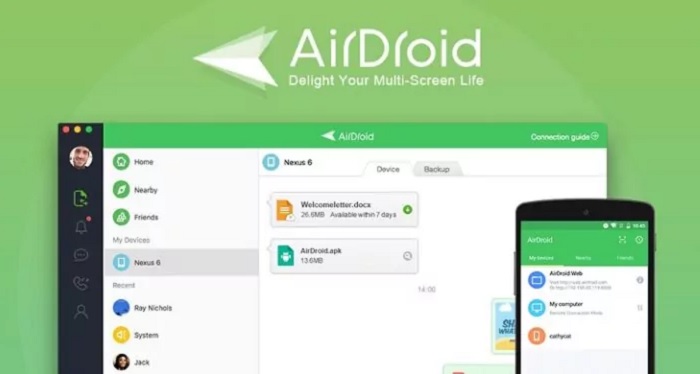
AirDroid is a mobile device management MDM) and file transfer software that allows users to access, manage, and control their Android device from a computer or another device. One of its awesome features is the AirDroid one-way audio that allows you to listen to the sound around your remote device while viewing the screen or using the camera.
Although it’s a nice feature that can serve the basics you’d want from a security camera, a lot of Android phone users have complained about not being able to use the feature on their devices. In this article, we will be giving you guidelines on how to troubleshoot AirDroid one-way audio. Before we get to that, let’s outline some possible causes.

AirDroid One-way Audio Not Working: Possible Causes
Working with AirDroid, you’re not buying any new device, as its service is entirely cloud-based. As such, much of the problem will be related to your settings, device compatibility, and app version.
-
Poor Network Connection
This is usually the first culprit when your AirDroid one-way audio seems to be failing. Everything about AirDroid is cloud-based, as such you need to have a strong internet connection before you can do anything meaningful with it. Lastly, if you’re connecting through a VPN, the feature is likely not to work properly.
-
Permission Not Granted
During your initial configuration, there is mandatory permission like Camera, Remote Control, and Screen Monitoring which you need to have toggled on before anything can work. In the screen mirroring, you need to make sure that One-Way Audio is toggled on for it to work. While that’s the case, several permissions may pop up on your phone, you need to grant them access before you can completely use AirDroid.
-
App not Updated
Although it’s very unlikely, that your problem will be directly associated with an outdated app, you’d want to make sure to always have the updated version for optimal performance. Meanwhile, if your app is too outdated, it may not launch at all.
-
Device Not Compatible
AirDroid is compatible with most devices; mobile phones, tablets, radios, digital signage, media content boxes, kiosks machines, smart TVs, home appliances, and even vending machines. However, the minimum specs to run the app on a smartphone is 2GB RAM on Android 4.4 (rooted only) or higher.
Preferably, you want to have a phone with 4GB RAM and running on Android 7 or higher. The higher your Android devices, the more compatible it is with the platform’s features. For example, connecting a Kiosk is only available for Android 10 and above.
AirDroid One-Way Audio Not Working: How to Fix
The AirDroid one-way feature is quite simple to set up, there’s little chance of making a mistake when you have a compatible device and follow the setup wizard. Troubleshooting steps are quite simple, you can execute them in no particular order.
- Check your network connection and make sure that it is strong and stable.
- Verify that you have granted the necessary permissions to the AirDroid app.
- Make sure that your device is compatible with the AirDroid one-way audio feature.
- Update your AirDroid app to the latest version.
How to Setup One-Way Audio on AirDroid Personal
This innovative feature grants you access to your device’s microphone, allowing you to listen to the surrounding sounds of your device’s location, all while you’re engaged in viewing your device’s screen or utilizing its camera. There are two methods of setting up your AirDroid; local connection, and remote connection.
Setting Up One-Way Audio on AirDroid Personal with Local Connection
- On the device you want to be controlled, download and install AirDroid and keep it running
- On the controller device, download and install AirMirror or go to web.airdroid.com (AirDroid Personal Web Client)
- Tap Remote Camera or Screening Mirror to connect the device.
- After connecting, tap the ear icon on the bottom menu
Setting Up One-Way Audio on AirDroid Personal with Local Connection
Do the following on the controlled device
- Download and install AirDroid and keep it running
- Navigate through Me >> Security & Remote Features >> Camera and Screen Mirroring >> Enabled Permissions
- Turn on the One-Way Audio option here
Do the following on the controller device
- Download and install AirMirror or go to web.android.com
- Select Remote Camera or Screen Mirroring to connect the device.
- After connecting, tap on the ear icon to enable the one-way audio
The one-way audio feature is free for local connection, but for remote connection, you need to be a premium user. Also, the audio feature is only available on the latest version of the AirDroid Persona and AirMirror app; that’s you want to make sure that your device is updated before trying it out.
Common Problems with AirDroid and How to Solve Them
AirDroid was first released in 2011 and since then, it has evolved into a comprehensive mobile device management platform, adding more features every year. With all its evolution, certain problems seem to be common across all users. While it’s not exactly a fault of the product, it’s something that troubles most first-time users.
-
AirDroid Slow Transfer Speed
To optimize the pace of file transfers, it’s recommended to have both devices connected to the same Wi-Fi channel. Before proceeding with the transfer process within the AirDroid Personal app, ensure the Wi-Fi connection is stable.
Consider connecting the devices in Lite mode to bolster the speed of file transfers using the AirDroid app. By adjusting the connectivity settings to Lite mode, you can effectively address any speed-related challenges that may arise during file transfers between devices.
-
AirDroid AutoStart
The AutoStart feature ensures seamless operation of the AirDroid app in the background of your device. To enable this functionality, navigate to your device’s settings and access either the Battery or Apps permissions section. Look for the Auto Start or Auto Launch option. Alternatively, you can explore options like Phone Manager or Security Manager.
This convenient feature facilitates the app’s initiation without requiring manual intervention. With AutoStart, you can effortlessly initiate the app’s operation behind the scenes, even without the user’s direct involvement.
-
AirDroid Connection Timed Out
To address the issue of connection timeouts and ensure a reliable link, utilize the connection diagnostic tool provided within the app. Open the AirDroid app, navigate through Me >> Help, and tap the icon for the Connection Diagnostic tool situated at the lower right corner of the screen. A pop-up window will appear; click on ‘Start Test’. The test module will run and promptly identify any potential connectivity problems related to AirDroid.
Should the issue persist, attempt a reconnection by clicking the ‘Resign URL’ option. If the connectivity problem remains unresolved, proceed by tapping ‘Show info’ and then ‘Report’. This will relay the connectivity matter to AirDroid’s support team, who will promptly assist you in resolving the issue and restoring seamless connectivity.
-
AirDroid not Connecting to Wi-Fi
If you’re facing difficulties connecting AirDroid to Wi-Fi, consider utilizing the Nearby Feature as a solution. In your AirDroid Personal app, navigate through Go Nearby >> Search, identify the device intended for the file transfer, and await confirmation from the receiver. Once confirmed, proceed to select the desired files and initiate their transfer to the receiver’s device.
-
AirDroid Failed to Transfer/Download Files
If you encounter challenges while attempting to transfer or download files using the AirDroid app, consider the following steps to address these issues. First, verify that the file format is compatible with the tool. If needed, employ the built-in file type converters to transform the files into more widely supported formats.
Furthermore, ensure a seamless transfer process by confirming the connectivity between devices. To optimize the file transfer or download experience, both devices need to be connected to the same Wi-Fi network.


