On your Roku device, you will notice a nice range of audio settings that can help enhance your TV viewing experience. Whether you’re on the lookout for surround sound capabilities, speech clarity, or simply want to even out the volume levels between different programs, Roku has everything you have your eyes out for.
By following the steps outlined below, you can easily understand and customize the audio settings on your Roku device to suit your preferences.
Roku Audio Settings Explained in Detail
First, let’s start with an overview of the different audio settings that Roku offers. There are several different options, each with its own unique features and benefits.
- Audio mode: This setting allows you to choose between Stereo, Dolby Digital, and Dolby Digital Plus. Stereo is the most basic option, while Dolby Digital and Dolby Digital Plus provide more advanced surround sound capabilities.
- HDMI audio mode: If you have a TV that supports HDMI Audio Return Channel (ARC), this setting allows you to select the type of audio that will be sent over the HDMI connection. You can choose between Auto-detect, PCM, and Bitstream.
- Volume mode: This setting allows you to choose between leveling or night modes. Leveling mode helps to even out the volume between different programs and channels, while night mode reduces the volume of loud sounds to prevent disturbing others in your household.
- Speech clarity: This setting helps to enhance the clarity of dialogue in movies and TV shows. You can choose between Off, Low, Medium, and High levels of speech clarity.
- Audio leveling: This setting adjusts the volume levels between different channels and programs. You can choose between Off, Night, and Auto.
Now that you have an overview of the different audio settings available on Roku, let’s dive into each one in more detail.
1. Audio Mode
The Audio Mode setting allows you to select the type of audio that will be used by your Roku device. By default, the audio mode is set to Stereo, which provides basic two-channel audio. If you have a surround sound system, you may want to choose either Dolby Digital or Dolby Digital Plus.
To change the audio mode on your Roku device, follow these steps:
- Press the Home button on your Roku remote
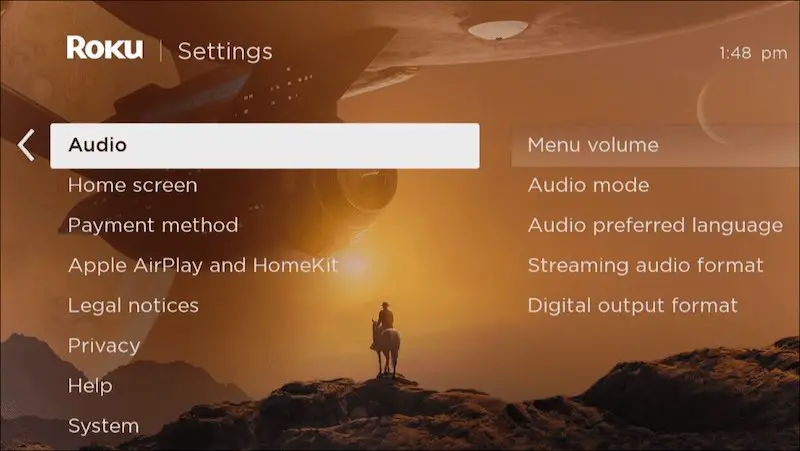
- Navigate to Settings and select Audio
- Select Audio mode
- Choose the audio mode you want to use (Stereo, Dolby Digital, or Dolby Digital Plus)
2. HDMI Audio Mode
With the HDMI Audio Mode setting, you get to choose the type of audio that will be sent over the HDMI connection to your TV. If HDMI Audio Return Channel is supported on your TV, you can choose between Auto-detect, PCM, and Bitstream.
To change the HDMI Audio Mode setting on your Roku device, follow these steps:
- Press the Home button on your Roku remote
- Navigate to Settings and select Audio
- Select HDMI audio mode
- Choose the audio mode you want to use (Auto-detect, PCM, or Bitstream)
3. Volume Mode
You can set between leveling or night modes in the Volume Mode. Leveling mode helps to even out the volume between different programs and channels, while night mode reduces the volume of loud sounds to prevent disturbing others in your household.
To change the Volume Mode setting on your Roku device, follow these instructions:
- Press the Home button on your Roku remote
- Navigate to Settings and select Audio
- Select Volume mode
- Choose the volume mode you want to use (Leveling or Night)
4. Speech Clarity
The Speech Clarity setting helps to enhance the clarity of dialogue in movies and TV shows. You can choose between Off, Low, Medium, and High levels of speech clarity.
To change the Speech Clarity setting on your Roku device, follow these steps:
- Press the Home button on your Roku remote
- Navigate to Settings and select Audio
- Select Speech clarity
- Choose the level of speech clarity you want to use (Off, Low, Medium, or High)
5. Audio leveling
The Audio Leveling setting adjusts the volume levels between different channels and programs. You options like Off, Night, and Auto.
To change the Audio Leveling setting on your Roku device, follow these steps:
- Press the Home button on your Roku remote
- Navigate to Settings and select Audio
- Select Audio leveling
- Choose the level of audio leveling you want to use (Off, Night, or Auto)
- Off: This setting turns off audio leveling, allowing the original volume levels of each program to play as they were intended.
- Night: This setting reduces the volume of loud sounds and raises the volume of soft sounds to make it easier to watch TV at night without disturbing others in your household.
- Auto: This setting automatically adjusts the volume levels between different programs and channels, making sure that they are all at a consistent volume level.
Best Roku Audio Settings
Before you start tweaking any settings, make sure that you have the right audio equipment to take full advantage of Roku’s capabilities.
If you have a surround sound system or soundbar, you’ll want to connect it to your Roku device using an HDMI cable. This gives you access to the Dolby Digital or Dolby Digital Plus audio modes, which provide more advanced surround sound capabilities than the default stereo mode.
Once you have your audio equipment set up, you can follow this example of how you might want to set them up to get the best possible output:
Audio mode: Dolby Digital Plus
Selecting Dolby Digital Plus will give you the best possible surround sound experience. To change the audio mode, simply follow the steps outlined above.
HDMI audio mode: Bitstream
Choosing Bitstream will allow your audio equipment to decode the Dolby Digital or Dolby Digital Plus signal coming from your Roku device. To change the HDMI audio mode, follow the steps outlined above.
Speech clarity: Medium
Medium speech clarity is a good balance between enhancing dialogue and not over-emphasizing it. If you have trouble hearing dialogue in movies and TV shows, you might want to try increasing the speech clarity to High.
Audio leveling: Auto
Auto audio leveling adjusts the volume levels between different programs and channels, making sure that they are all at a consistent volume level. This can be especially helpful if you’re watching TV at night and don’t want to cause a disturbance.


