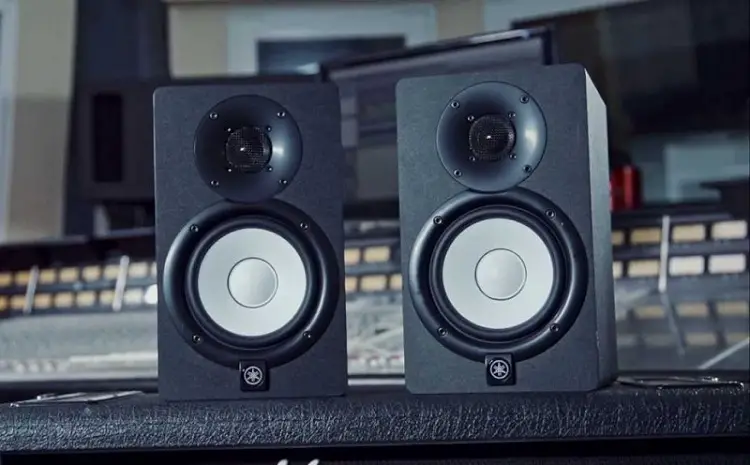
Music lovers, producers, and sound engineers on the search for exceptional audio quality will find the best sound experience in the Yamaha HS5 studio monitor. These compact yet powerful speakers have become the top options for delivering clear and accurate sound reproduction.
If you already have a Yamaha HS5 and you’re looking for the best settings to get the best sound experience, this article will help you out.
In this article, you will find the best settings to optimize your listening experience. We’ll explain each setting in detail, so you can know just how to set up the speakers and get the best results.

Features of the Yamaha HS5
Aside from the settings options that allow you to optimize the sound reproduction to your taste, the Yamaha HS5 comes with several high-end features that make it a top choice for audio enthusiasts and professionals.
Exception Sound Quality: The Yamaha HS5 features a 5-inch cone woofer and a 1-inch dome tweeter, carefully designed to provide a wide range of frequencies and precise sound placement. This ensures that every detail of your audio is accurately represented
Bi-amp System for Enhanced Performance: Equipped with a bi-amplification system, the HS5 optimizes power distribution between the woofer and tweeter. This means that each driver has its own amplifier, resulting in better control over the audio signal and reduced distortion.
Accurate Sound Placement with Waveguide Technology: The HS5 incorporates waveguide technology inspired by Yamaha’s flagship studio monitors. This technology enhances sound placement and provides a broad “sweet spot” for accurate stereo imaging. Whether you’re sitting at your mixing console or moving around the room, the HS5 ensures consistent sound dispersion.
Versatile Connectivity Options: The HS5 offers versatile connectivity, making it compatible with various audio sources. It features XLR and TRS inputs, allowing seamless connection to professional mixing consoles, audio interfaces, or other equipment.
Understanding the Yamaha HS5 Settings
- High Trim Switch: The High Trim switch, located on the back of the HS5 speakers, allows you to adjust the high-frequency response. This helps you customize the sound based on your room’s acoustics. The switch has two options: -2dB and 0dB. Choosing -2dB reduces the brightness of the sound slightly, which is useful in rooms that sound too sharp. Selecting 0dB maintains a neutral sound.
- Room Control Switch: The Room Control switch, also on the back panel, and its function is to make up for excessive bass caused by speaker placement near walls or corners. This switch reduces the bass response, creating a more balanced sound. In this option, you will find two settings: 0dB and -2dB. If your room has too much bass or sounds muddy, setting it to -2dB helps improve clarity.
Adjusting Yamaha HS5 Settings
To optimize your Yamaha HS5 monitors, you can apply the following settings:
- Placement: Ensure both speakers are at an equal distance from your listening position. This should form triangle. The benefit of this is to create a balanced stereo image and accurate soundstage.
- High Trim Switch: Start by setting the High Trim switch to 0dB. To get the correct settings, you would want to listen to different tracks and watch out for high frequencies. If the sound is too bright or harsh, try switching to -2dB and compare. Choose the setting that sounds natural and pleasing to your ears.
- Room Control Switch: Begin with the Room Control switch at 0dB. Play tracks with heavy bass and assess the low-frequency response. If you notice excessive bass, switch to -2dB and see the difference. Go for the setting that provides a balanced and well-defined bass response.
- Listening Tests: After adjusting the High Trim and Room Control switches, you should try listening to a variety of music, including your own mixes, to ensure the changes match your preferences. If they’re not up to your taste, you can fine-tune the settings, using trial and error until you find the best configuration for your room and personal taste.
Best Settings for Yamaha HS5
You can try out these settings for the best sound reproduction on your Yamaha HS5 monitors
Music Listening
- High Trim Switch: Set the High Trim switch to 0dB initially. With this setting, you get to maintain a neutral sound response, so you can hear your music as intended by the artist.
- Room Control Switch: For music listening, start with the Room Control switch set to 0dB. This provides a balanced bass response suitable for most listening environments. You might want to switch it to -2dB, if you notice any bass build up.
Conclusion
The Yamaha HS5 studio monitors are one of the best options for accurate and high-quality sound. Note that you can always tweak the settings to suit your preferences. Listening to different mixes can help speed up the process, ensuring you get perfect sound reproduction.


![How Loud is a 1000-Watt Speaker? [Analysis] How Loud is a 1000-Watt Speaker? [Analysis]](https://audiojust.com/wp-content/uploads/2023/08/how-loud-is-a-1000-watt-speaker-211x150.jpg)


