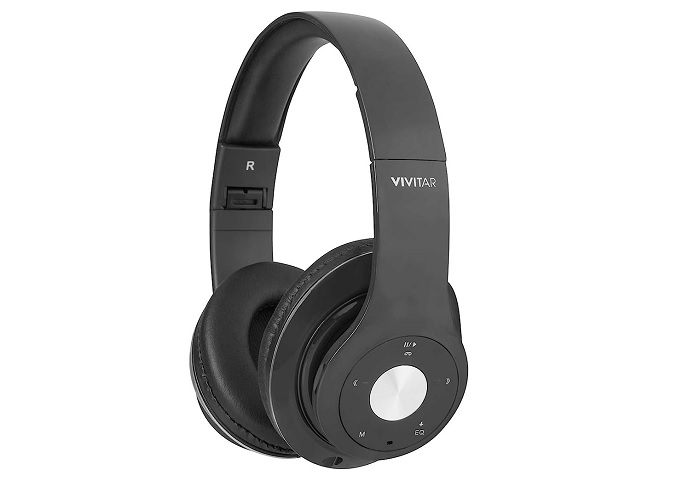
Vivitar Bluetooth Headphones are one of those brands you can trust to deliver high-quality sounds and still last you through years of use. While it is a reliable and durable option, the issue of not being able to pair the headphones to any of your devices arises very often with Bluetooth headphones.
The problem of your Vivitar headphones not being able to pair can be due to several reasons, like incompatibility and connectivity issues. Fortunately, there are several fixes to apply to get the headphones paired again.
In this guide, we have provided a breakdown of the causes of Vivitar headphones not being able to pair and the fixes to apply to resolve the issue.

Vivitar Bluetooth Headphones Not Pairing: Likely Causes
- Low Battery: You might want to start with the obvious reason for the Vivitar headphones not pairing, which is low battery power. If your Vivitar Bluetooth headphones are not sufficiently charged, they may not have enough energy to establish a stable Bluetooth connection. You should confirm that the headphones are fully charged before pairing them with your device.
- Bluetooth Setting Disabled: Chances are the Bluetooth setting being disabled on your device. Bluetooth needs to be enabled on your device to establish a connection with the headphones. If Bluetooth is turned off, your Vivitar headphones won’t be able to communicate with your device, resulting in pairing issues.
- Previous Pairings: Your Vivitar headphones might still be trying to connect to a device they were previously paired with. If you have paired your headphones with another device in the past, they may automatically prioritize that connection. As a result, they might not enter pairing mode or show up in the available devices list when attempting to pair with a new device.
- Software Glitches: Occasionally, software glitches can cause pairing issues. These glitches may affect either the headphones or your device’s Bluetooth system. These glitches can disrupt the pairing process and prevent successful connections.
- Compatibility Issues: Pairing problems can also arise due to compatibility issues between your Vivitar headphones and the device you’re trying to pair them with. Different Bluetooth versions or protocols may not work seamlessly together, leading to pairing failures. Firmware updates from Vivitar can sometimes address compatibility issues and improve the chances of successful pairing.
Vivitar Bluetooth Headphones Not Pairing: DIY Fixes
1. Check the Basics
- Ensure that your Vivitar Bluetooth headphones are charged and turned on.
- Look for a power button or switch on the headphones and verify they have sufficient battery life.
- Charge the headphones fully before attempting to pair them.
2. Enable Bluetooth on Your Device
- Go to the settings menu or notification panel on your device.
- Locate the Bluetooth option and make sure it is enabled.
- Keep your device within a reasonable range of the headphones to establish a strong Bluetooth connection.
3. “Forget” Previous Pairings
- Access the Bluetooth settings on your device.
- Look for the list of paired devices and find your Vivitar headphones.
- Select the option to “Forget” or “Unpair” the headphones from your device to remove any previous connections.
4. Reset Headphones
- Find a small reset button on your Vivitar headphones or check the user manual for reset instructions.
- Press and hold the reset button for a few seconds until you observe a confirmation light or hear a sound indicating the reset is complete.
- Resetting the headphones can often resolve pairing issues by clearing any previous settings.
5. Enter Pairing Mode
Follow the specific instructions provided in your Vivitar headphones’ user manual to enter pairing mode.
- You’ll need to press and hold the power button or a dedicated pairing button on the headphones for a few seconds.
- Look for a flashing light or listen for a sound indicating that the headphones are in pairing mode.
6. Pair with Your Device
- Return to the Bluetooth settings on your device and locate the list of available devices.
- Wait for your Vivitar headphones to appear in the list.
- Select your headphones from the list to initiate the pairing process.
- If prompted, enter any required passcodes or PINs to complete the pairing.
7. Update Firmware
- Check the Vivitar website to check if a firmware update is available for your headphones.
- If any, download and install the firmware update.
8. Contact Customer Support
- If applying all the steps above did not resolve the pairing issue, reach out to Vivitar’s customer support.
- Contact their support team to help you out with troubleshooting steps that will resolve the problem.
Note that the steps provided above may vary depending on your Vivitar headphone model. If you run into any obstacles while following the instructions above, you can also check the user manual for the most accurate and up-to-date instructions tailored to your headphones.


![Razer Nari Essential Mic Not Working [FIXED] Razer Nari Essential Mic Not Working [FIXED]](https://audiojust.com/wp-content/uploads/2023/07/razer-nari-essential-mic-not-working-211x150.jpg)